
Understanding Acne and the Power of DIY Solutions
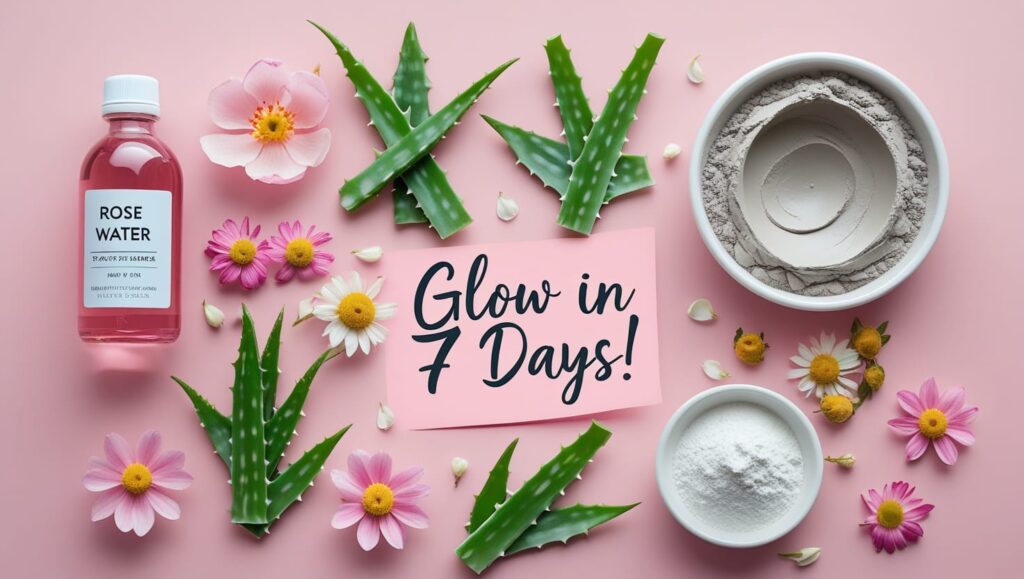
Hey there, glow-getter! Are you ready to dive into the “glow-up zone” and discover some game-changing acne skincare tips that could transform your skin in as little as seven days? If you’ve ever felt that wave of frustration looking in the mirror, wishing for a complexion that’s calm, clear, and confident, you are so not alone. Acne isn’t just about a few pesky spots; it can be a real confidence-knocker, influencing how you feel stepping out into the world, from busy mornings juggling mom-life to important presentations at work. But here’s the exciting news: achieving clearer skin doesn’t always require expensive treatments or complicated routines. In fact, some of the most potent solutions might already be chilling in your kitchen pantry! Get ready to explore the amazing world of DIY skincare, where natural ingredients meet effective results. This is your first step towards embracing your natural beauty and feeling fabulous in your own skin.
The Common Enemy: What Really Causes Those Pesky Breakouts?
So, what’s the deal with acne anyway? Before we jump into the amazing acne skincare tips and home remedies, let’s get friendly with the basics. Think of your skin as a bustling city. Sometimes, things can go a little haywire. Acne typically pops up (literally!) when tiny openings in your skin, called hair follicles, get clogged. But what’s clogging them? Usually, it’s a combination of a few culprits:
- Excess Oil (Sebum): Your skin naturally produces an oil called sebum to keep itself moisturized. But sometimes, your oil glands go into overdrive (hello, hormones, stress, or genetics!) and produce too much. This extra oil can create a sticky situation.
- Dead Skin Cells: Your skin is constantly renewing itself, shedding old cells to make way for new ones. If these dead cells don’t shed properly, they can mix with that excess sebum and form a plug in your follicles.
- Bacteria (P. acnes): There’s a type of bacteria called Propionibacterium acnes (P. acnes) that normally lives on your skin without causing trouble. But when a follicle gets clogged, it creates the perfect anaerobic (oxygen-free) environment for these bacteria to multiply like crazy. This leads to inflammation – that’s the redness, swelling, and soreness we associate with pimples.
- Inflammation: This is your body’s response to the bacterial overgrowth and clogged pores. It’s what makes pimples red, swollen, and sometimes painful.
Other factors can also join the party and make acne worse. Hormonal fluctuations (think your monthly cycle, pregnancy, or stress), certain medications, diet (for some people, high-glycemic foods or dairy can be triggers), and even using the wrong skincare products can all play a role. Understanding these triggers is the first step in tailoring your acne skincare tips effectively.
Why Go DIY? The Glowing Benefits of Natural Acne Skincare Tips at Home
Alright, now for the fun part! Why choose the DIY route when there are aisles and aisles of products promising miracles? For busy moms, career women, and beauty enthusiasts alike, crafting your own natural acne solutions offers some seriously glowing advantages:
- You’re the Boss of Ingredients: No more squinting at tiny labels trying to decipher a long list of chemicals you can’t pronounce! With DIY, you know exactly what’s going onto your skin. This means you can avoid harsh sulfates, parabens, artificial fragrances, and other potential irritants that can sometimes make acne-prone skin even angrier.
- Budget-Friendly Beauty: Let’s be real, high-end skincare can cost a pretty penny. DIY recipes often use simple, affordable ingredients you might already have in your kitchen – think oatmeal, honey, yogurt, or green tea. This makes consistent skincare accessible without breaking the bank. More money for those coral outfits, right?
- Tailor-Made for You: Your skin is unique, and so are its needs. DIY allows you to customize recipes. Is your skin oily? Add a little more clay or tea tree oil. Feeling sensitive? Aloe vera or chamomile can be your best friends. You get to play scientist and create blends that are perfect for your complexion.
- Freshness is Best: When you whip up a DIY mask, you’re using ingredients at their freshest, without the need for long lists of preservatives designed to give products a multi-year shelf life. Fresh means potent and packed with goodness!
- Embrace the Natural Power: Mother Nature has gifted us with an incredible pharmacy of ingredients that have been used for centuries to heal and beautify. From the anti-inflammatory power of turmeric to the antibacterial magic of honey, these natural wonders can be incredibly effective for calming breakouts and promoting clear skin. These are the kind of clear skin tips that feel good inside and out.
- It’s Actually Fun! There’s something incredibly satisfying about creating your own skincare. It’s a little bit of self-care, a dash of creativity, and a whole lot of empowerment. Think of it as your 10-15 minute escape – a mini spa moment in your trendy bathroom.
Remember, while DIY skincare is amazing, it’s about finding what works for you. Some people thrive on entirely natural routines, while others might find a balance between DIY and carefully selected store-bought products. The journey to clear skin is personal, and these acne skincare tips are here to guide you.
Your First Crucial Step: The Patch Test Power-Up!
Okay, before you get all excited and start slathering that gorgeous homemade mask all over your face (and trust me, you’ll want to!), we need to talk about the most important rule in the DIY skincare club: the patch test. This is non-negotiable, especially when you’re trying new ingredients or recipes. Even natural ingredients can cause reactions in some people.
Think of it like this: you wouldn’t wear a new outfit for a super important event without trying it on first, right? Same goes for your skin!
How to Patch Test Like a Pro
- Whip up a tiny amount of your chosen DIY recipe.
- Apply a small dab to an inconspicuous area of your skin. Good spots include the inside of your wrist, behind your ear, or along your jawline.
- Wait for 24 hours (or at least overnight). Try to keep the area dry.
- After 24 hours, check for any signs of irritation – redness, itching, burning, or bumps.
If your skin looks and feels happy, you’re good to glow! If you notice any irritation, it’s best to skip that particular recipe or ingredient. This simple step can save you from a whole lot of potential skin drama and is one of the smartest acne skincare tips you can follow.
Safety/Pro Tip: Always perform a patch test 24 hours before applying any new DIY recipe to your entire face, especially if you have sensitive skin. This helps prevent potential allergic reactions or irritation from natural ingredients.
Your 7-Day Kickstart: Easy DIY Recipes for Acne-Prone Skin
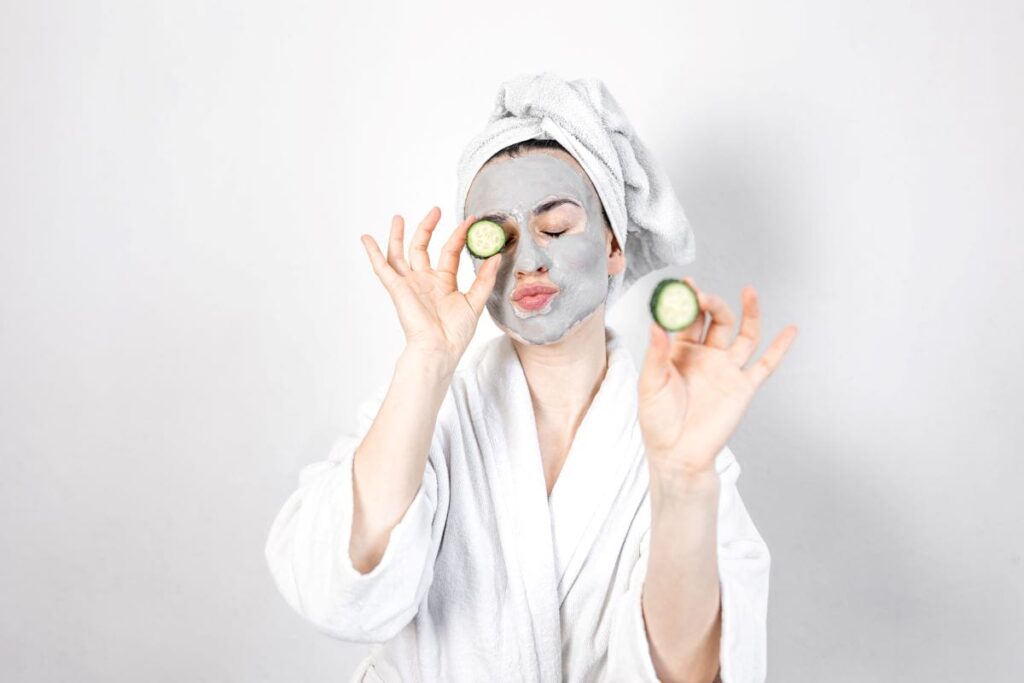
Now that you understand a bit more about what causes those unwelcome breakouts and why DIY is such a fantastic path to explore, it’s time to roll up your sleeves (perhaps those of a chic coral robe?) and get hands-on. This is where your journey to clearer skin really takes off! We’re about to dive into some super simple, yet incredibly effective, DIY acne remedies that you can whip up in 10-15 minutes. These recipes are designed to be beginner-friendly, using ingredients that are kind to your skin and your wallet. Think of your trendy bathroom transforming into a mini-spa, a sanctuary where you craft your own potent potions. Get ready to pamper your skin with the goodness of nature and kickstart that 7-day glow-up with these powerful acne skincare tips!
1. Soothing Oatmeal & Honey Gentle Cleanser/Mask
This dynamic duo is a classic for a reason! Oatmeal is incredibly soothing and gently exfoliates, while honey is a natural humectant (draws in moisture) and boasts antibacterial properties. It’s perfect for calming inflamed, angry skin.
What You’ll Need:
- 2 tablespoons finely ground oatmeal (colloidal oatmeal is fantastic, or just whizz regular oats in a blender)
- 1 tablespoon raw, organic honey
- Optional: 1 teaspoon of warm water or plain yogurt to adjust consistency
Glow-Up Steps:
- Combine the ground oatmeal and honey in a small, clean bowl.
- If using, add the warm water or yogurt and mix until you have a smooth, spreadable paste.
- To use as a cleanser, gently massage onto damp skin in circular motions, then rinse with lukewarm water. To use as a mask, apply a thicker layer to your face, leave on for 10-15 minutes, then rinse.
- Pat your skin dry with a clean towel.
Best For: All skin types, especially sensitive, irritated, or inflamed acne.
Smart Swap: For extra soothing and probiotic benefits, opt for plain, unsweetened yogurt as your mixing liquid. If your skin is very dry, a tiny drop of jojoba oil can be added.
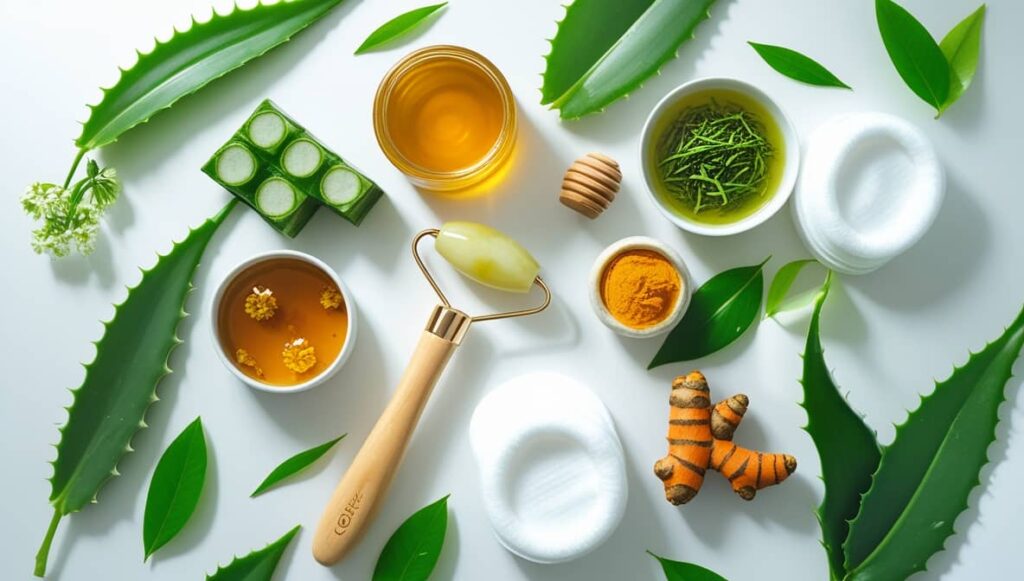
Mighty Clay & Tea Tree Oil Blemish Buster Mask
When your skin feels oily and congested, this mask is your superhero. Clay (like Bentonite or Kaolin) is a star at drawing out impurities and soaking up excess oil, while tea tree oil is a renowned antibacterial powerhouse, making it one of the best natural acne solutions.
What You’ll Need:
- 1 tablespoon Bentonite clay (for more oil absorption) or Kaolin clay (gentler)
- 1-2 teaspoons filtered water or diluted apple cider vinegar (1 part ACV to 3 parts water)
- 1-2 drops pure, Organic Tea Tree Oil (Remember, this is potent! A little goes a long way. You can find a good quality one like Organic Tea Tree Oil for around $10.)
Glow-Up Steps:
- In a non-metallic bowl (metal can react with clay), combine the clay with your chosen liquid, mixing with a non-metallic spoon (wood or plastic) until a smooth paste forms. Add liquid slowly to get the right consistency.
- Stir in the tea tree oil.
- Apply a thin, even layer to your clean face, avoiding the delicate eye and mouth areas.
- Let it dry for 10-15 minutes (it shouldn’t crack completely – that can be too drying). Rinse thoroughly with lukewarm water and pat dry.
Best For: Oily and acne-prone skin.
Smart Swap: If you have sensitive skin, opt for white Kaolin clay which is much milder than Bentonite. You can also swap the water/ACV for rosewater or chamomile tea for added soothing benefits.
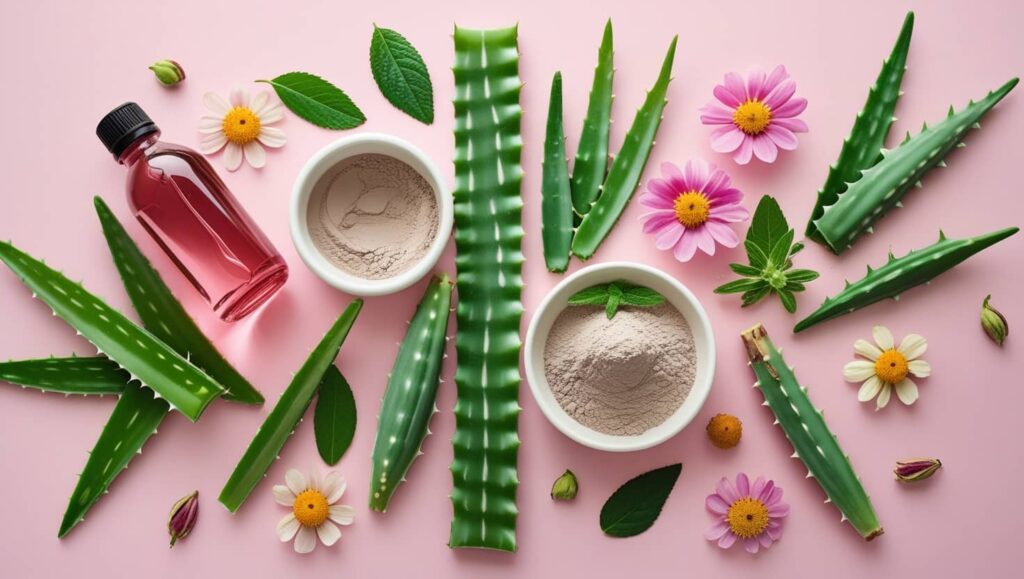
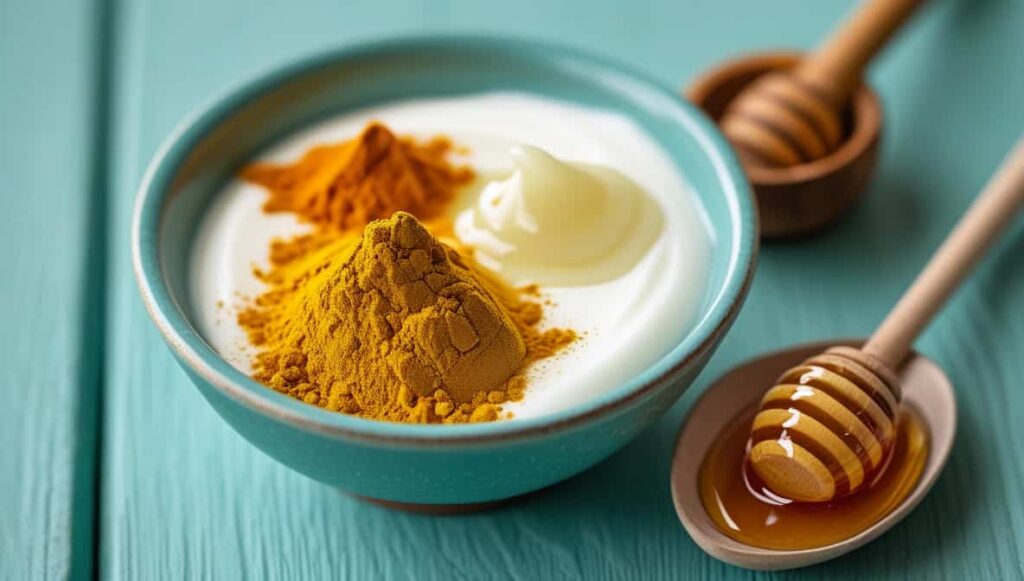
Turmeric & Yogurt Brightening Spot Solution/Mask
Turmeric is a golden spice celebrated for its potent anti-inflammatory properties, thanks to its active compound, curcumin. Yogurt contains lactic acid, a gentle exfoliant, and probiotics. This combo can help reduce redness and promote a brighter complexion.

What You’ll Need:
- 1/2 teaspoon organic turmeric powder
- 1 tablespoon plain, unsweetened yogurt (full-fat is great for extra nourishment)
- Optional: 1/2 teaspoon raw honey (for added antibacterial and moisturizing benefits)
Glow-Up Steps:
- In a small bowl, mix the turmeric powder, yogurt, and honey (if using) until well combined into a smooth paste.
- You can apply this as a spot treatment directly onto blemishes or as a thin layer for an all-over face mask.
- Leave on for 10-15 minutes.
- Rinse thoroughly with lukewarm water. Be mindful, as turmeric can temporarily stain fair skin or light-colored washcloths. Using a gentle cleanser afterwards can help remove any yellow hue.
Best For: Most skin types looking to reduce inflammation and brighten skin.
Smart Swap: If you’re concerned about turmeric staining, use a very small amount or ensure it’s thoroughly mixed with a larger quantity of yogurt. You can also do a patch test on your inner arm first to see if it stains your skin tone.
Balancing Apple Cider Vinegar (ACV) Toner (Dilution is Key!)
Apple Cider Vinegar (ACV) often gets a lot of buzz in the world of natural acne solutions. It has antibacterial properties and can help restore the skin’s natural pH balance, which can be disrupted when you have acne. However, it’s very acidic and must be diluted properly.
What You’ll Need:
- 1 part raw, unfiltered Apple Cider Vinegar (look for one “with the mother”)
- 3-4 parts distilled or filtered water (start with more water if you’re new to ACV)
Glow-Up Steps:
- Mix the ACV and distilled water in a clean bottle. Shake well.
- After cleansing your face, apply the diluted ACV toner using a cotton pad, gently wiping it over your skin. Avoid the eye area.
- Allow it to dry, then follow with your usual moisturizer.
- Start by using this 2-3 times a week and see how your skin responds.
Best For: Oily and acne-prone skin. Use with extreme caution on sensitive or dry skin.
Smart Swap: If ACV feels too strong even when diluted, try using alcohol-free witch hazel or cooled green tea as a toner instead. You can also increase the water-to-ACV ratio (e.g., 1 part ACV to 8 parts water).
Calming Aloe Vera & Green Tea Hydrator/Mask
When your skin is feeling irritated, red, or just needs a drink of hydration without heavy creams, this soothing blend is perfection. Aloe vera is a well-known skin soother and hydrator, while green tea is packed with antioxidants that can help fight inflammation and protect the skin.
What You’ll Need:
- 2 tablespoons pure Aloe Vera Gel (look for one with minimal additives, like Pure Aloe Vera Gel often available for around $15)
- 1 tablespoon freshly brewed and cooled green tea
Glow-Up Steps:
- Brew a cup of green tea and let it cool completely.
- In a clean bowl, mix the aloe vera gel with the cooled green tea until you have a smooth, slightly liquid gel.
- Apply to your clean face and neck. You can use it as a lightweight moisturizer or apply a thicker layer as a hydrating mask for 15-20 minutes.
- If using as a mask, rinse off with cool water. If using as a light moisturizer, you can let it absorb.
Best For: All skin types, especially sensitive, irritated, sun-exposed, or dehydrated acne-prone skin.
Smart Swap: Add a drop of lavender essential oil (patch test first!) for extra calming benefits, or a teaspoon of cucumber juice for more cooling hydration.
Safety/Pro Tip: When crafting your DIY acne remedies, always use clean utensils and bowls to prevent introducing bacteria into your preparations. If a recipe calls for water, use distilled or filtered water if possible, especially for toners or leave-on products.
Beyond Recipes: Essential Lifestyle Acne Skincare Tips for Lasting Clarity
Those delightful DIY recipes from your kitchen are fantastic allies in your mission for clear skin, and they are a cornerstone of effective acne skincare tips. But to truly cultivate that lasting “glow-up” and keep breakouts at bay well beyond your initial 7-day kickstart, it’s often about weaving those topical treatments into a more holistic approach. Think of it like this: your skin is a reflection of your overall well-being. So, while treating it lovingly from the outside is crucial, the habits you cultivate in your daily life—from how you manage stress to what you sip on throughout the day—play an equally powerful role. Let’s explore some essential lifestyle clear skin tips that complement your DIY efforts, helping you build a comprehensive strategy for a radiant, healthy complexion that truly shines from within.
Building Your Simple Anti-Acne Skincare Routine
Consistency is queen when it comes to skincare, especially for acne-prone complexions. You don’t need a complicated 12-step regimen, particularly when you’re a busy mom or juggling a career. A simple, effective routine is far more sustainable. Here’s a basic framework:
Gentle Cleansing (Morning & Night): Start and end your day by washing your face with a mild cleanser. In the morning, this removes any oil and sweat accumulated overnight. In the evening, it’s crucial for washing away makeup, sunscreen, dirt, and pollutants. You can even use your DIY Oatmeal & Honey Cleanser here!

Treat (As Needed): This is where your targeted DIY acne remedies come in.
- Masks: Use your Clay & Tea Tree Oil Mask or Turmeric & Yogurt Mask 2-3 times a week, depending on your skin’s needs.
- Spot Treatments: Apply your Turmeric & Yogurt Spot Solution or a diluted ACV dab directly onto active blemishes.
- Toner: If you use a toner like the DIY Apple Cider Vinegar Toner, apply it after cleansing and before moisturizing, a few times a week.
Moisturize (Morning & Night): Yes, even oily and acne-prone skin needs moisture! Skipping moisturizer can actually make your skin produce more oil to compensate. Opt for a lightweight, non-comedogenic (won’t clog pores) moisturizer. Your DIY Aloe Vera & Green Tea Hydrator can be perfect here, especially in the daytime.
Hydration Hero: Drink Your Way to Healthier Skin
You’ve heard it a million times, but it bears repeating: water is LIFE, especially for your skin! Proper hydration helps your body flush out toxins, aids in nutrient delivery to skin cells, and keeps your skin looking plump and healthy. When you’re dehydrated, your skin can appear dull and may even trigger more oil production, potentially worsening acne.
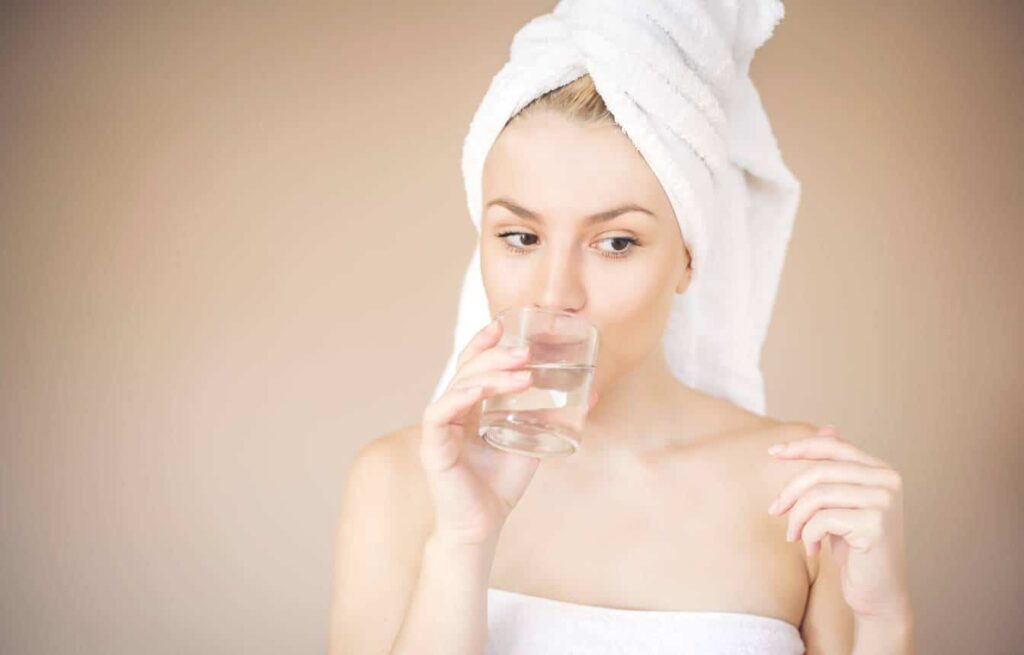
- Aim to drink at least 8 glasses (around 2 liters) of water throughout the day.
- Carry a stylish reusable water bottle with you as a reminder. Something like the Reusable Water Bottle (around $15) not only helps you stay hydrated but is also eco-friendly! Infuse your water with lemon, cucumber, or mint for a refreshing twist. This simple habit is one of the easiest yet most impactful clear skin tips.
The Stress-Acne Connection: Finding Your Calm for Clearer Skin
Ever notice how a monster pimple decides to show up right before a big presentation or during a particularly chaotic week with the kids? That’s no coincidence! Stress triggers the release of cortisol, a hormone that can increase oil production and inflammation, leading to breakouts. Finding healthy ways to manage stress isn’t just good for your mind; it’s crucial for your skin.
- Incorporate stress-relieving activities into your routine, even if it’s just for 10-15 minutes a day.
- Consider gentle exercises like yoga. Did you know that specific [Internal Link: Yoga Poses to Melt Stress Away Unwind and Relax Naturally] can significantly help in calming your nervous system and, in turn, benefit your skin?
- Meditation, deep breathing exercises, spending time in nature, or even just listening to calming music can also make a big difference.
Dietary Do's and Don'ts: Fueling Your Glow from Within
While the direct link between diet and acne can vary greatly from person to person, what you eat can certainly influence your skin’s health. Some find that certain foods trigger their breakouts, while others notice an improvement when they focus on whole, unprocessed foods.
- Consider Limiting: Highly processed foods, sugary drinks and snacks, and for some individuals, dairy or high-glycemic index foods (like white bread and pastries) might be culprits.
- Focus On: A rainbow of fruits and vegetables (packed with antioxidants), lean proteins, healthy fats (like avocados and nuts), and whole grains. These foods provide essential nutrients that support skin repair and health. While not specifically for acne, adopting principles of healthy eating, such as those outlined in a balanced plan like the 7-Day Detox Diet Plan to Lose Weight: Simple Recipes (focusing on its whole food and hydration aspects), can contribute to overall well-being, which often reflects in your skin.
- This isn’t about restrictive dieting, but rather about being mindful and observing if certain foods affect your skin. Keeping a food diary can be helpful!
Hands Off! The Golden Rule of Acne Care
This might be one of the toughest acne skincare tips to follow, but it’s so important: avoid picking, popping, or squeezing your pimples! Messing with blemishes can push bacteria deeper into the pore, worsen inflammation, lead to scarring, and prolong the healing process. Let your DIY treatments do their work, and trust the process. If you’re a habitual picker, try keeping your hands busy or placing a small hydrocolloid patch on a particularly tempting spot.
Cleanliness Counts: Little Habits, Big Impact
Think about all the things your face comes into contact with daily.
- Pillowcases: Change them frequently (at least twice a week). They accumulate oil, dead skin cells, and bacteria.
- Phone Screen: Wipe it down regularly with an antibacterial wipe. You press it against your face all the time!
- Makeup Brushes & Sponges: Clean these tools weekly to prevent bacteria buildup and product residue from clogging your pores.
Your Clear Skin Checklist (Integrated into Your Routine):
To make these clear skin tips easy to follow, think of it as a simple weekly checklist integrated into your lifestyle:
- Daily: Gentle cleansing AM & PM? Check. Moisturize AM & PM? Check. Sip on water throughout the day? Check. Hands off those blemishes? Check!
- 2-3 Times a Week: Apply a DIY treatment mask? Check. Exfoliate gently (if needed, your oatmeal cleanser can do this)? Check.
- Weekly: Change pillowcases? Check. Clean makeup brushes? Check. Wipe down phone screen frequently? Check. Dedicate time for a stress-reducing activity like yoga? Check.
DIY vs. Store-Bought: The Real Talk (Pros & Cons)
We’ve championed DIY, but let’s keep it real. Both DIY and store-bought products have their place.
- DIY Pros: You control ingredients, it’s budget-friendly, fresh, customizable, and empowers you. Ideal for those who love natural acne solutions.
- DIY Cons: Shorter shelf life (usually make small batches), requires a bit of effort and time, and effectiveness can vary.
- Store-Bought Pros: Convenient, often formulated with specific concentrations of active ingredients by dermatologists/scientists, longer shelf life, and can target very specific concerns with advanced technology.
- Store-Bought Cons: Can be expensive, may contain potential irritants or unnecessary fillers, and it’s harder to know the exact percentage of “key” ingredients sometimes.
Many people find a happy medium, using DIY for gentle masks and cleansers while relying on a store-bought serum or targeted treatment with scientifically proven actives like salicylic acid or retinoids if needed. If you’re considering supplements to support your skin health from within as part of a holistic approach, products like DermaPrime Plus aim to offer skin-nourishing ingredients, but always research and consult a professional before adding any new supplement to your routine.
Safety/Pro Tip: While embracing natural solutions, don’t forget sun protection! Sun exposure can worsen acne inflammation and cause post-inflammatory hyperpigmentation (those dark spots left after a pimple heals). Use a broad-spectrum, non-comedogenic sunscreen with at least SPF 30 every single day, even if it’s cloudy.
Maintaining Your Glow: Long-Term Strategies & Your Questions Answered
Embracing those DIY recipes and lifestyle adjustments is a phenomenal way to kickstart your journey toward the clear, radiant skin you deserve. As you’ve seen, combining effective topical care with mindful daily habits creates a powerful synergy. But the real secret to that lasting “glow-up zone” isn’t just a quick fix; it’s about transforming these acne skincare tips into sustainable practices. Think of this as graduating from a 7-day skin kickstart to a long-term love affair with your complexion. It’s about consistency, patience, and celebrating every small victory along the way. So, how do you keep that gorgeous glow going strong and navigate any bumps (pun intended!) that might appear down the road? Let’s dive into maintaining your results and answer some of your most pressing questions.
The 7-Day Challenge and Beyond: Making Your Results Stick
That initial week of focused effort, trying out new DIY acne remedies and paying closer attention to your skin’s needs, can create amazing momentum. To build on this, consider framing it as a “7-Day Clear Skin Kickstart Challenge.” But what happens after day seven?
- Consistency is Your Superpower: We’ve said it before, but it’s the golden rule. Stick to your simple AM/PM routine of cleansing and moisturizing. Continue using your DIY treatment masks 2-3 times a week as needed.
- Listen to Your Skin: Your skin’s needs can change with the seasons, your hormonal cycle, or stress levels. Pay attention. If it feels dry, maybe ease up on clay masks and add more Aloe Vera & Green Tea Hydrator. If you’re breaking out more, assess if any new products or habits (or stress!) are contributing.
- Embrace the Journey, Not Just Perfection: Aim for progress, not poreless, flawless perfection (which, by the way, mostly exists in filtered photos!). Small, consistent efforts add up to big changes over time.
- Consider a “30-Day Glow-Up Challenge”: If you loved the 7-day kickstart, why not extend it? Commit to 30 days of consistent skincare, healthy habits (hydration, mindful eating, stress management), and tracking your progress. This can really help solidify these new routines.
- Don’t Be Afraid to Tweak: As you learn more about what your skin loves, feel free to adjust your DIY recipes or routine. That’s the beauty of these natural acne solutions – they are adaptable!
Your Acne Skincare FAQ: Quick Answers to Common Questions
It’s natural to have questions when you’re embarking on a new skincare journey. Here are answers to some frequently asked ones:
Q: How quickly will I really see results with these acne skincare tips? A: While our title playfully suggests “Clear Skin in 7 Days,” and you can definitely see improvements like reduced redness and calmer skin within a week with consistent effort, significant, lasting changes often take longer. Skin cell turnover takes about 28 days (longer as we age). So, give your new routine at least 4-6 weeks to see more substantial results. The initial 7 days are about building good habits and giving your skin a focused boost!
Q: Can DIY recipes actually make my acne worse? A: It’s possible, though less common if you’re careful. This is why patch testing is crucial. Some people can be sensitive or allergic to even natural ingredients. Also, using ingredients that are too harsh for your skin type (like undiluted ACV or too-frequent exfoliation) or not using clean utensils can sometimes lead to irritation or breakouts. Always listen to your skin!
Q: What’s the most crucial step in an acne skincare routine? A: If we had to pick just one, it would arguably be consistent, gentle cleansing. Removing dirt, oil, and impurities twice a day without stripping your skin provides a clean canvas for any treatments to work effectively and helps prevent new clogs. But honestly, consistency across a simple routine (cleanse, treat, moisturize, protect) is the true MVP.
Q: Are natural acne solutions always better or safer than store-bought products? A: “Natural” doesn’t automatically mean “better” or “safer” for everyone. Poison ivy is natural, right? While DIY acne remedies offer fantastic benefits like ingredient control and avoiding harsh chemicals, some natural ingredients can still be potent and potentially irritating for certain skin types. The key is to choose ingredients wisely, patch test, and find what works for your unique skin. Sometimes, a combination of DIY and carefully chosen store-bought products (especially those with proven actives like salicylic acid or retinoids for stubborn acne) might be the best approach.
Q: How often should I use DIY acne masks for the best results? A: Generally, 2-3 times a week is a good frequency for treatment masks like clay-based or turmeric ones. Using them too often, especially clay masks, can dry out your skin. Hydrating masks, like the Aloe Vera & Green Tea one, can often be used more frequently if your skin loves them. Always observe how your skin responds and adjust accordingly.
Real Story, Real Glow: "How I Got Clearer Skin in 7 Days!
“As a busy mom of two, my skincare routine was pretty much non-existent, and my skin showed it – constant breakouts and a dull complexion really got me down,” shares Sarah M., a fellow beauty enthusiast. “I was skeptical about getting results in just 7 days, but I decided to try the acne skincare tips focusing on gentle DIY recipes like the oatmeal-honey mask and making sure I drank more water. I also started the 10-minute yoga poses for stress you mentioned. Honestly, by day 4, my skin already felt calmer. After a full week, the redness had significantly reduced, my active breakouts were smaller, and I just felt…brighter! It wasn’t a miracle cure for every single spot, but the improvement was so noticeable. It gave me the motivation to stick with it, and now, these clear skin tips are just part of my lifestyle. I finally feel confident without a thick layer of makeup!”
Ready to Embrace Your Glow?
You are now armed with a wealth of acne skincare tips, from potent DIY recipes to lifestyle-enhancing habits. The journey to clear, confident skin is yours to own! Why not start your own “7-Day Clear Skin Kickstart Challenge” today? Pick a couple of recipes, commit to that extra glass of water, and find a few minutes for yourself.
Affiliate Disclosure: This article contains affiliate links. If you purchase through these links, we may earn a small commission at no extra cost to you. We only recommend products we believe in and that align with the natural, effective ethos of Daily Habit Journey.